How to Setup VPN on Android L2TP/IPSec (7.0 Nougat)
This guide will show you how to get up and running with VPN on Android 7.0 Nougat using the L2TP/IPSec protocol. For more about the L2TP/IPsec technology you can read this Layer 2 Tunneling Protocol wikipedia article.
L2TP is a great option for creating a VPN because Android has built-in support for it automatically, which means you don't need to install anything from the Play store.
Steps for Setup VPN on Android L2TP/IPSec (7.0 Nougat)
-
Purchase a VPN account.
Get an account at the superb VPN provider VPN.ac and start enjoying the peace of mind that your internet privacy is protected. -
Login and navigate to your VPN Service details.
The username and password for your VPN connection are different than your account login. Create these VPN credentials on the VPN username and password management page after you login. You will need to click the 'View Details' button to navigate to the password entry screen.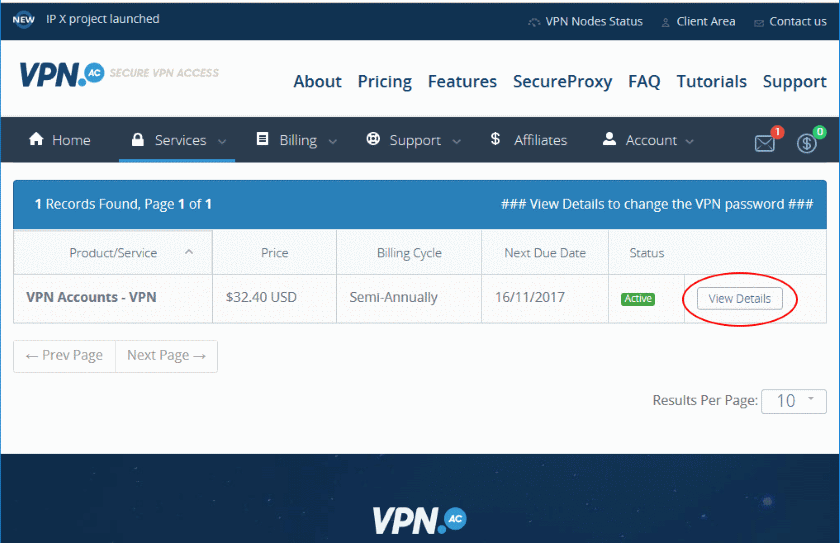
-
Find your VPN username create your VPN password.
Your VPN username will automatically be created for you and displayed right above your password entry field. Enter your desired password in both of the password fields and click 'Save Changes'. Store your username and password in a secure location, we recommend Password Safe, you will need these credentials when you setup your VPN connection.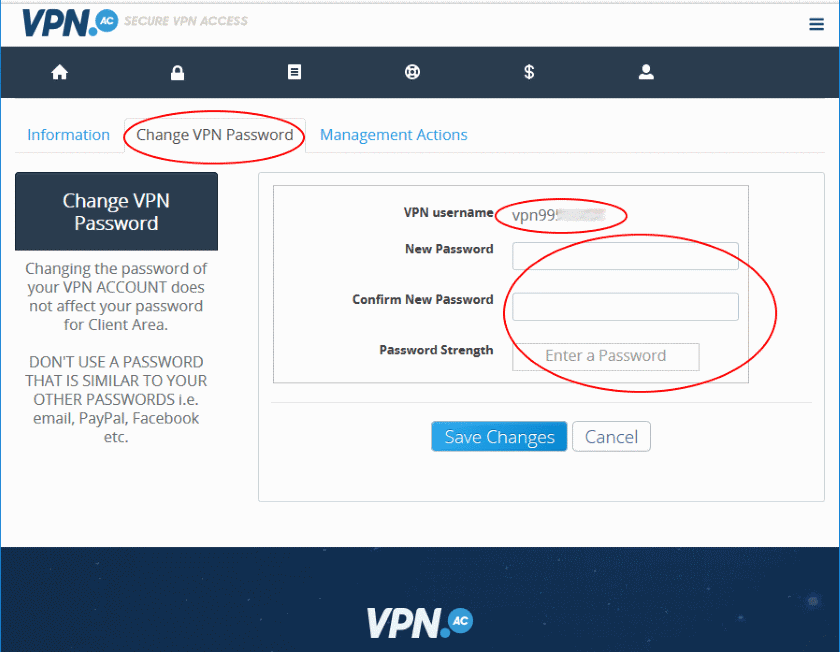
-
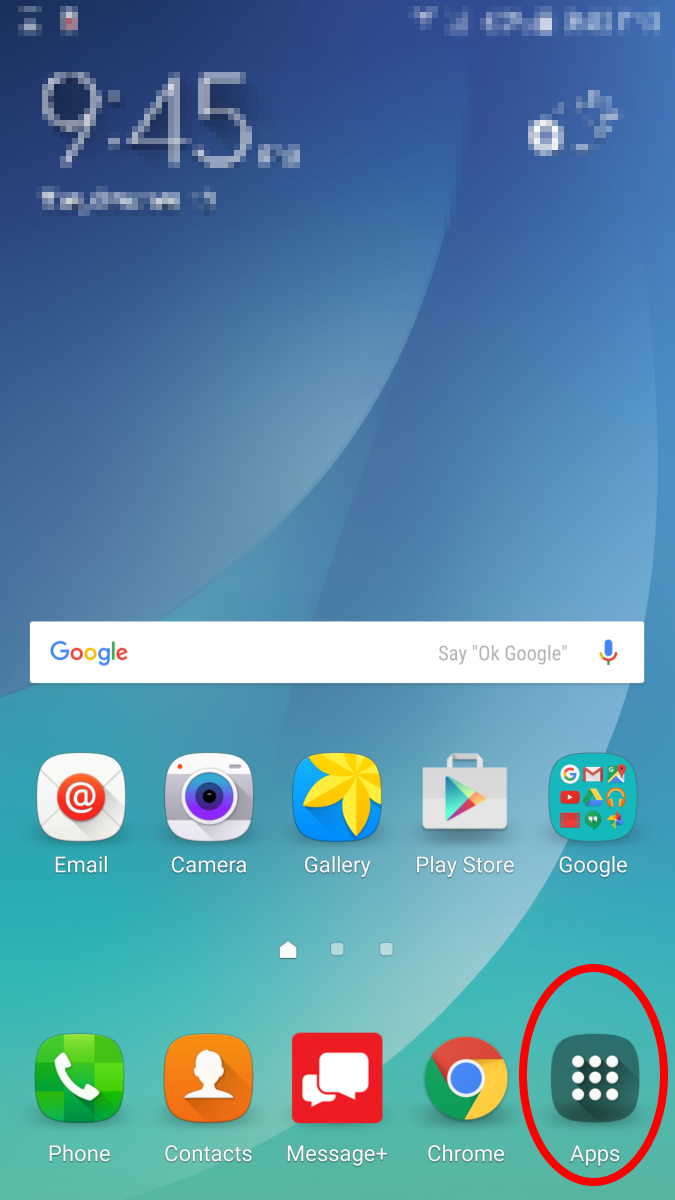
Open your Android Home Screen and locate the 'Apps' icon in the lower right and press it. If your device does not have an Apps icon on the home screen, you can get to the settings by swiping down from the top notification bar with two fingers. Press the gear icon you will be shown your devices settings, you can skip to Step 6.
-
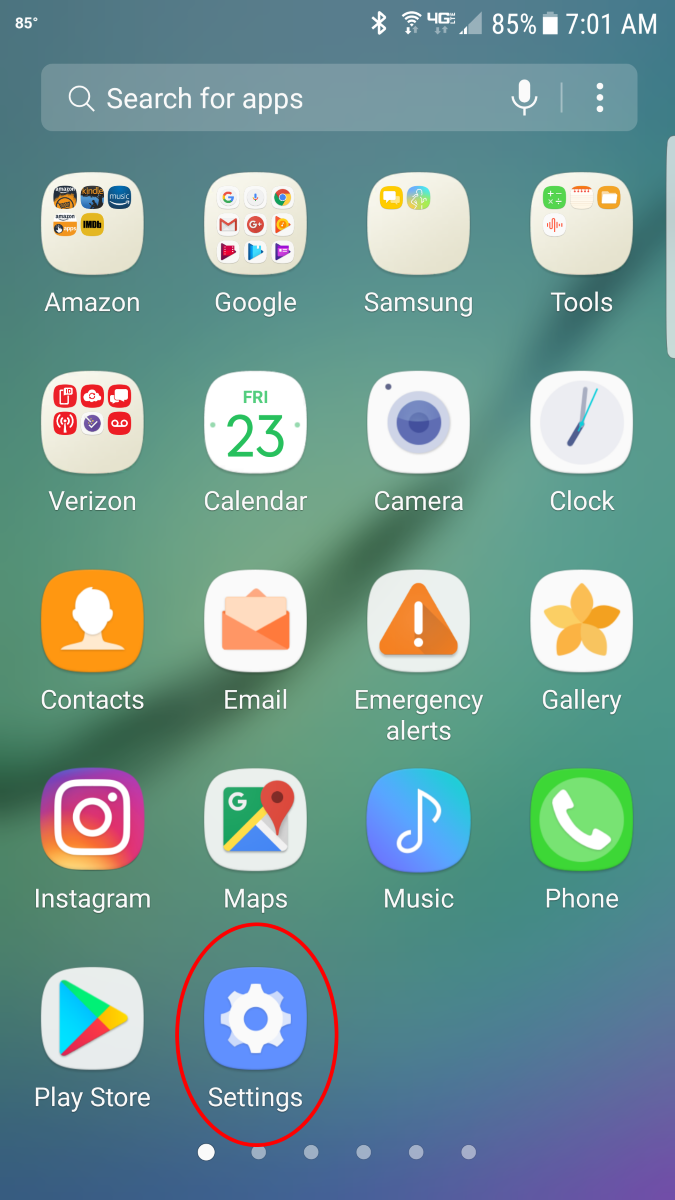
In the list of Apps, swipe until you get to the gear icon labeled 'Settings' and press it.
-
Press the 'More' option at the bottom of the wireless and networks panel.

-
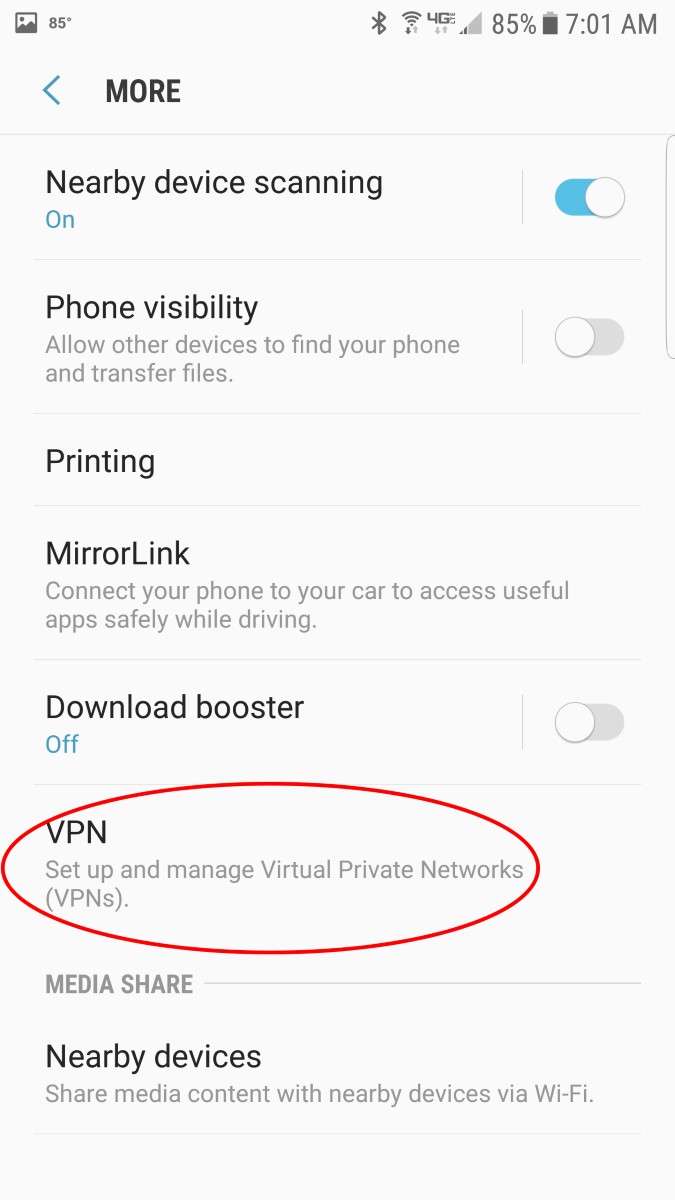
Press the 'VPN' option in the middle of the screen.
-
Press the 'Basic VPN' option at the top of the list.

-
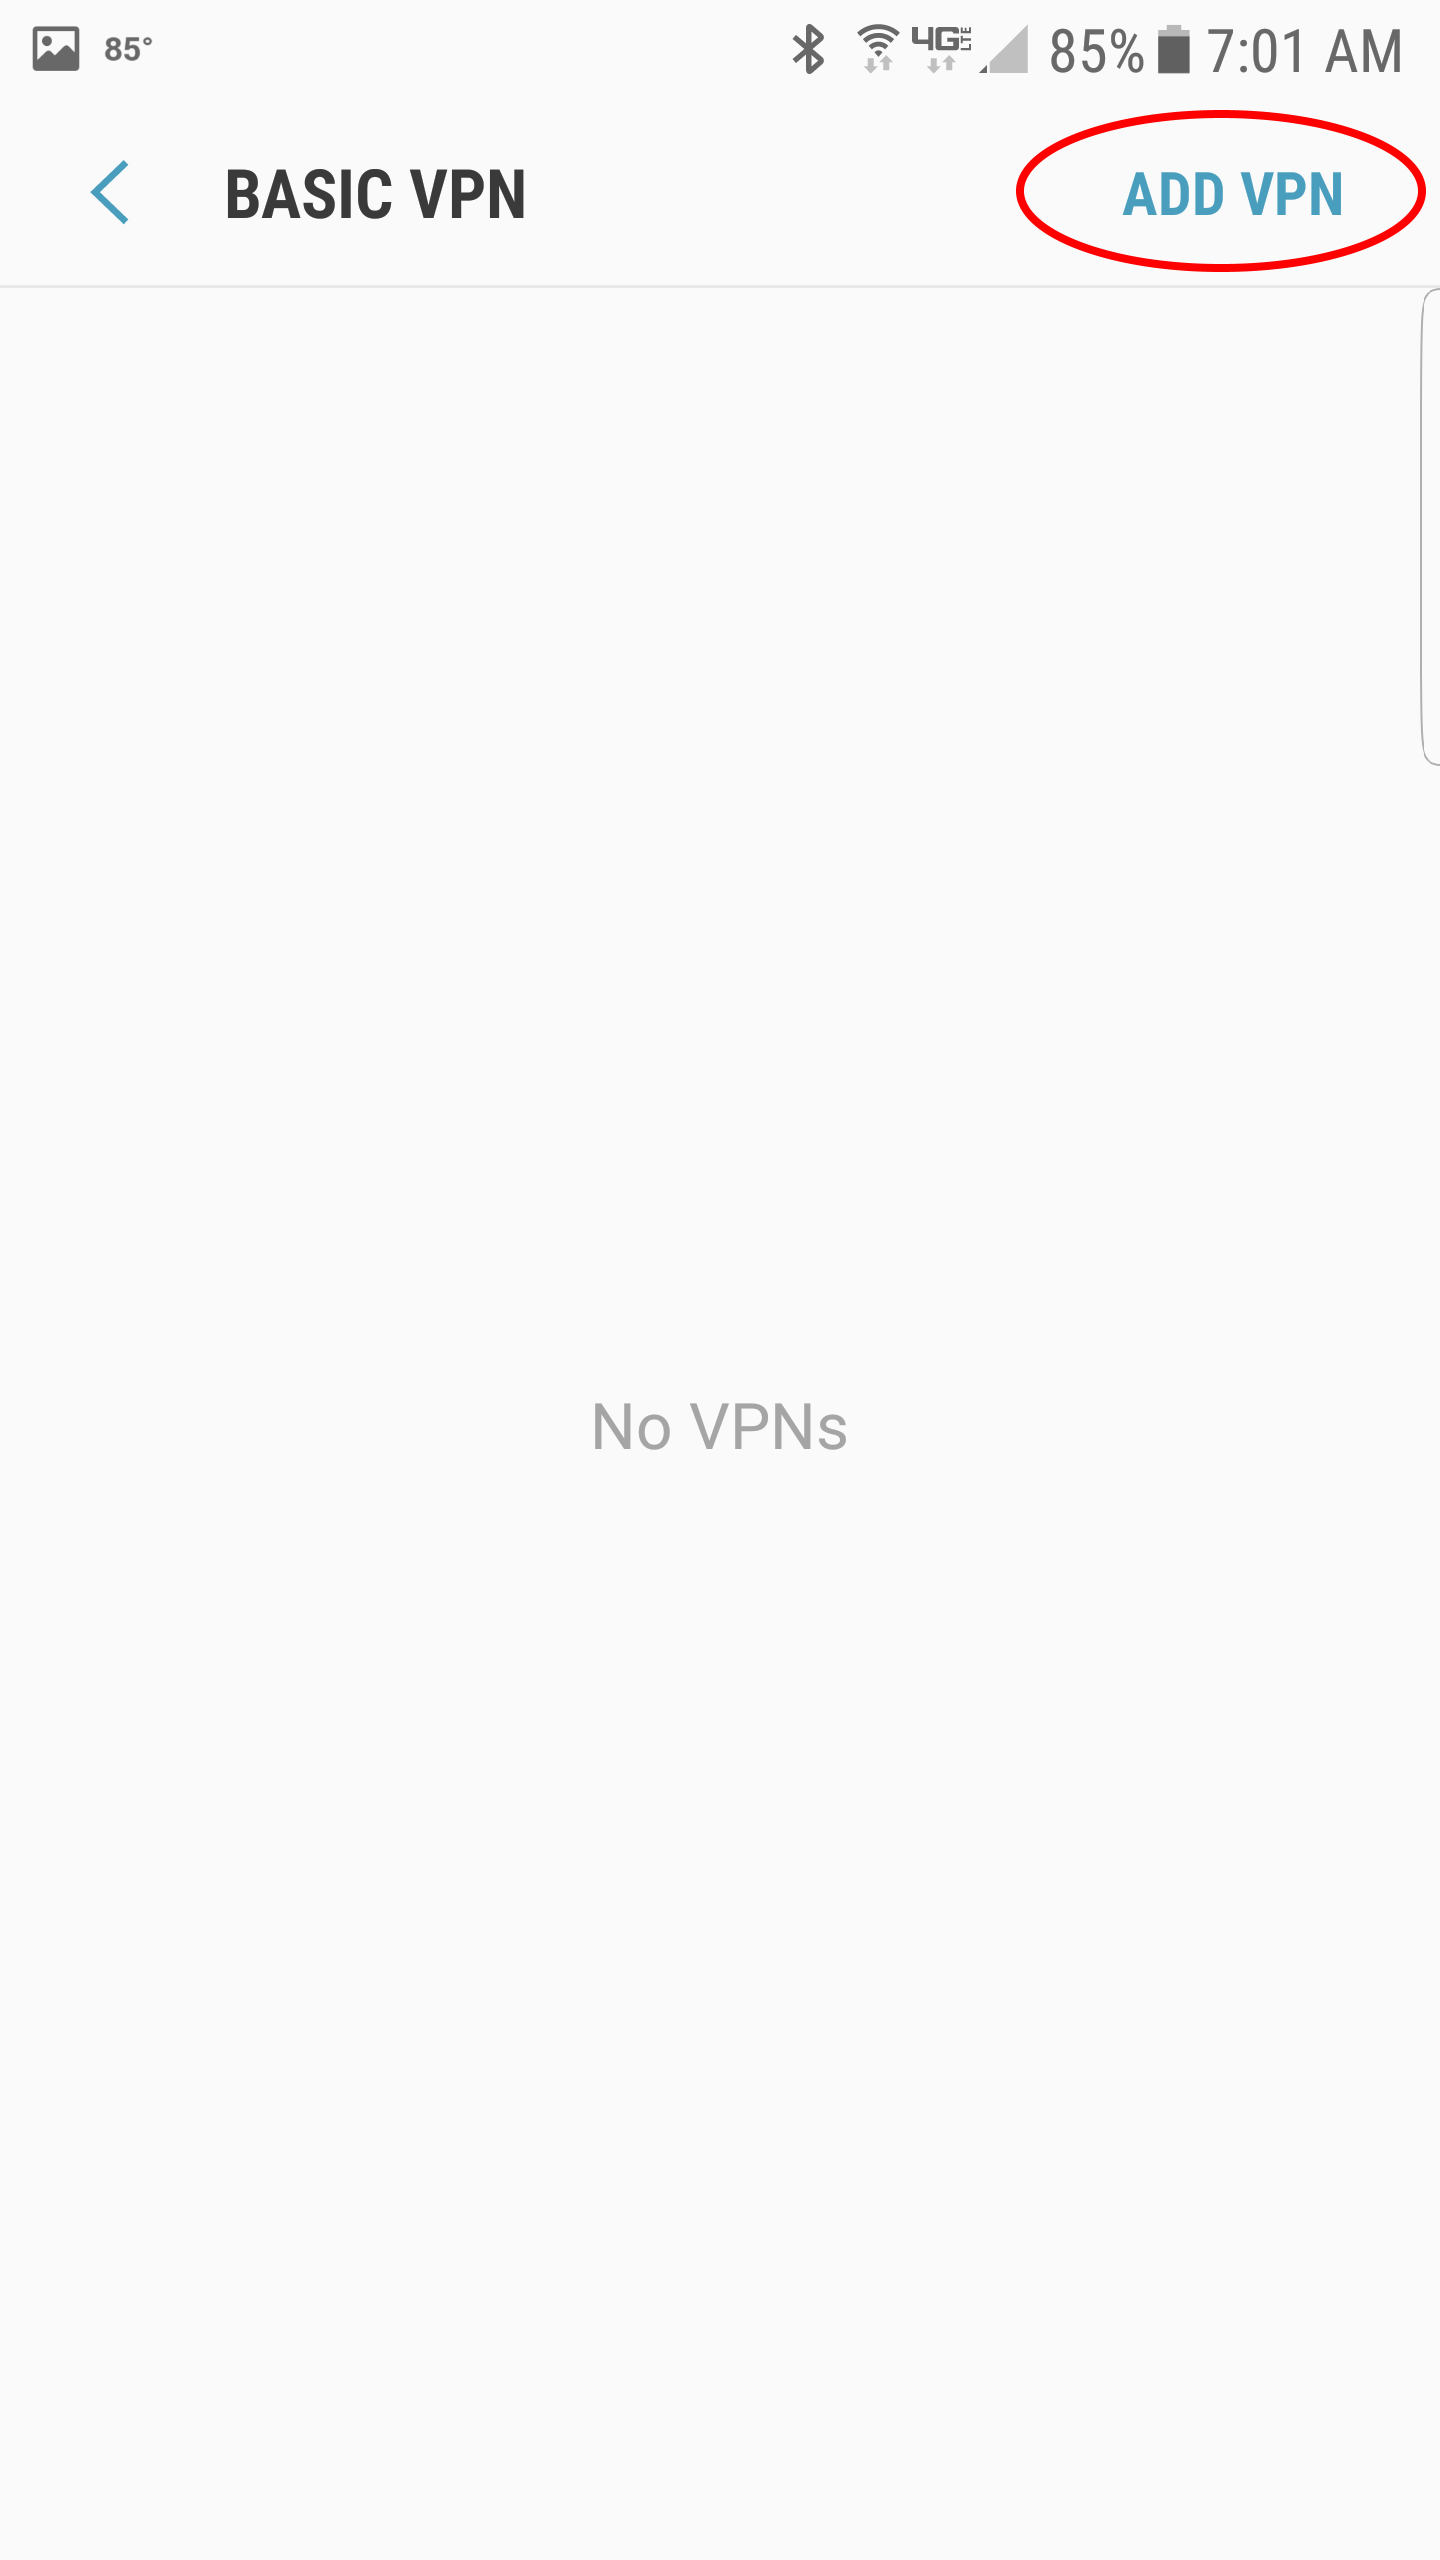
Press the 'ADD VPN' option in the upper right menu.
-
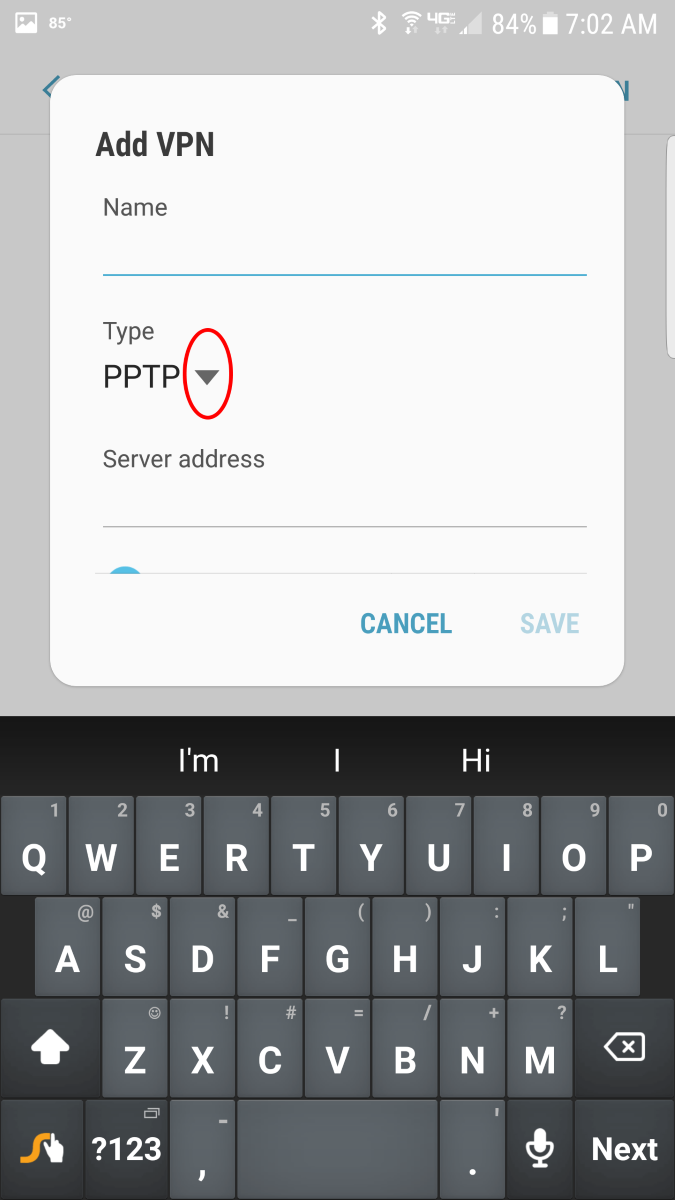
Press the down-arrow under Type.
-
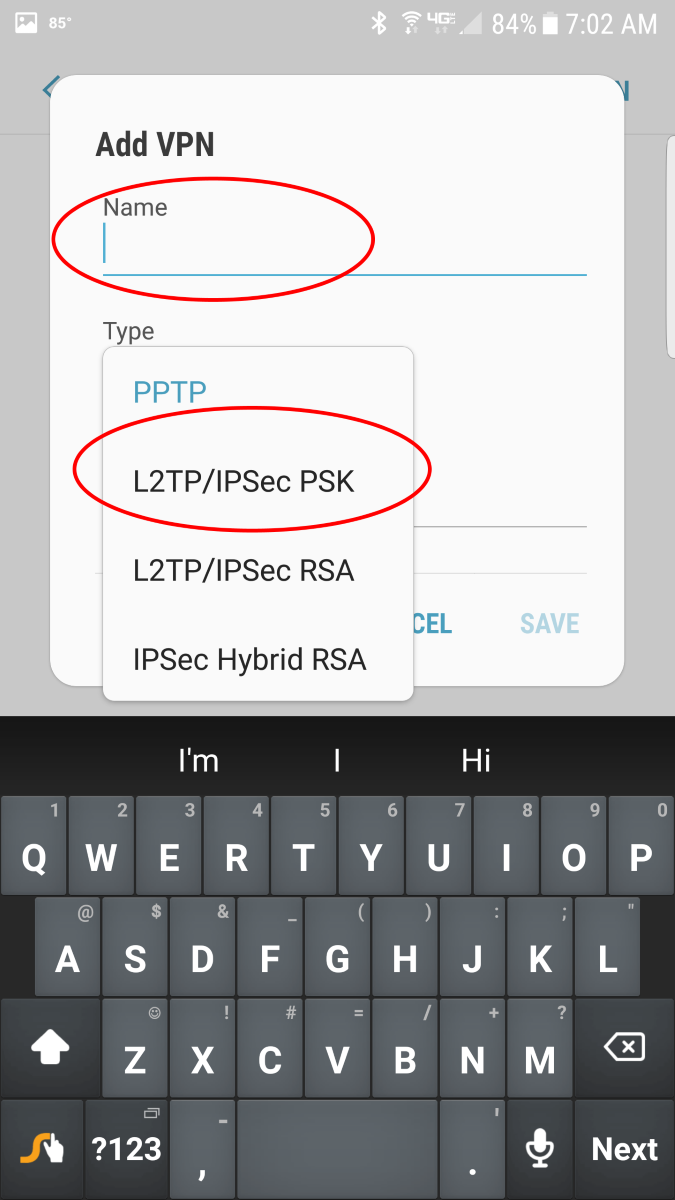
Select 'L2TP/IPSec PSK' and type in a name in the 'Name' field.
-
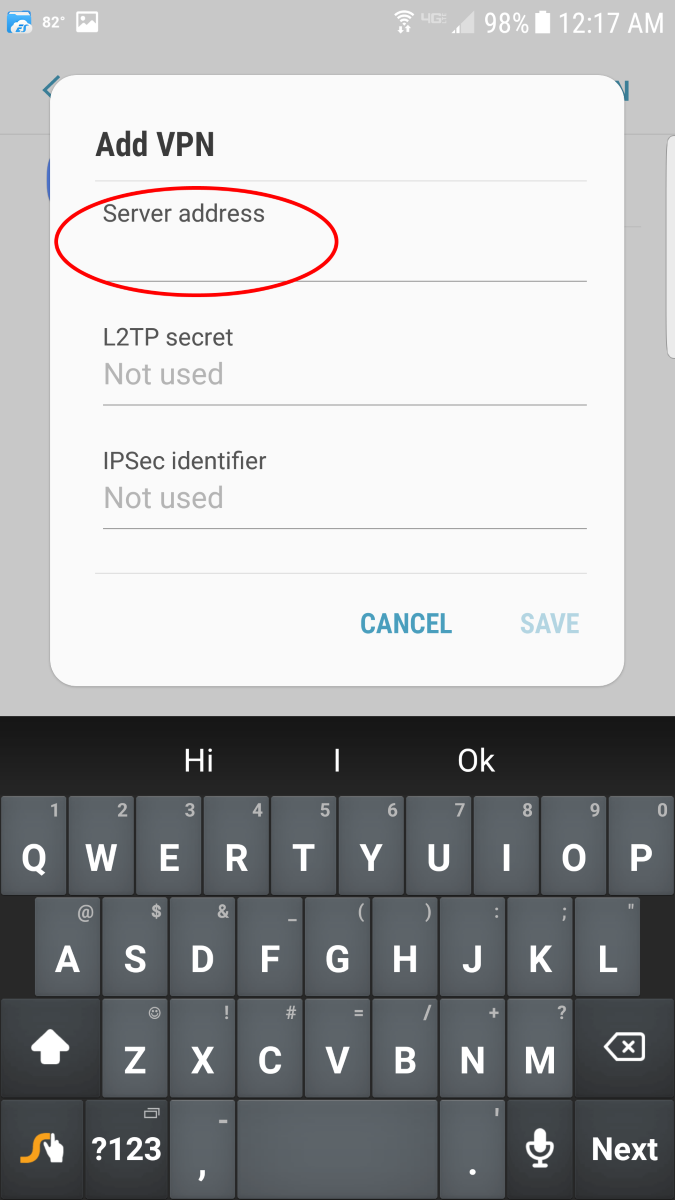
Scroll down and set the field 'Server address' to the value of the HOSTNAME column from this list of servers, something like us1.vpn.ac, uk1.vpn.ac, etc.; preferably choose the server that is closest to you, although any of these servers will work accordingly.
-
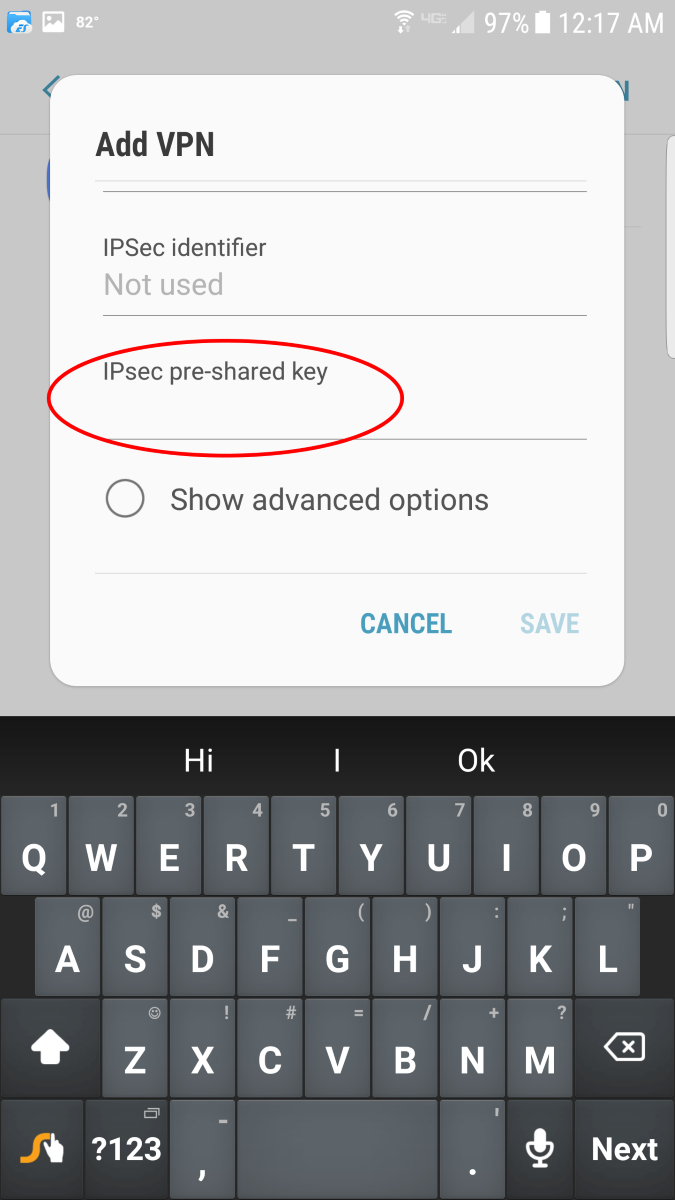
Scroll down and set the field 'IPSec pre-shared key' to vpnacshared# .
-
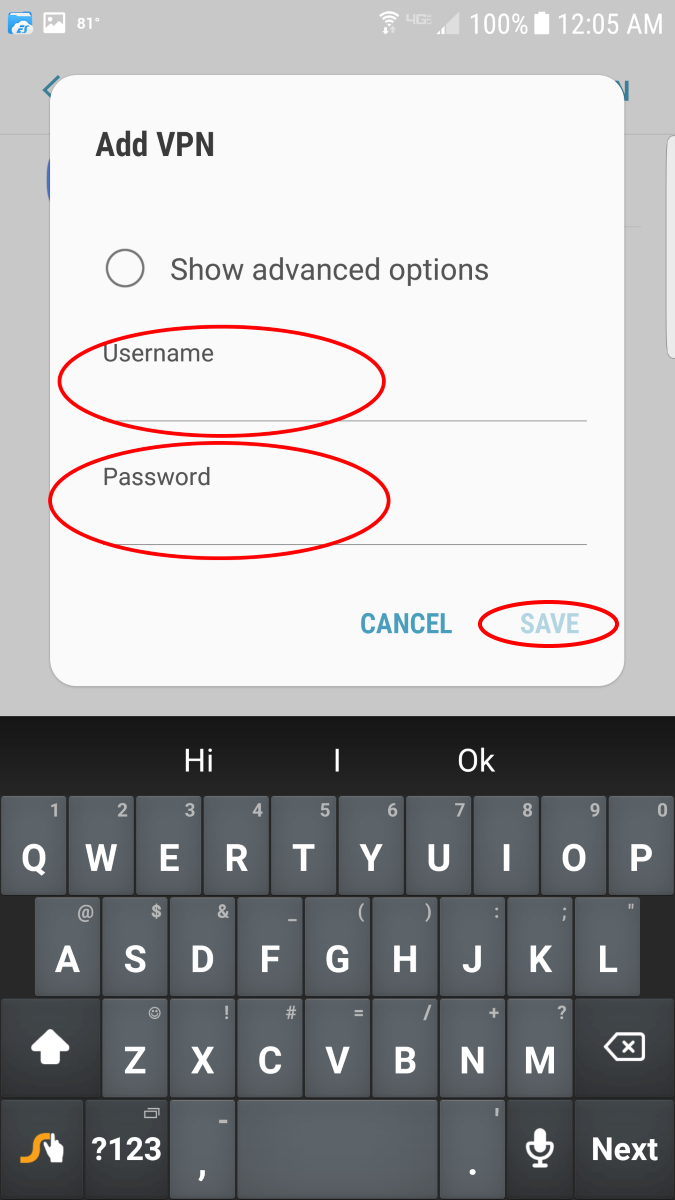
Scroll down and set the field 'Username' to your VPN username from step 2, something like vpn995XXXXX. THIS IS NOT THE SAME USERNAME as your website login, make sure you followed step 2 and created the separate VPN username and password. Set the field 'Password' to the password you created in step 2. Finally press 'Save'.
-
Connect to your new VPN connection. Under the 'BASIC VPN' section, you should now see a new VPN connection with the name you provided in step 10. Press this to connect. To get to this connection screen in the future, you can follow these same steps starting at step 4.

-
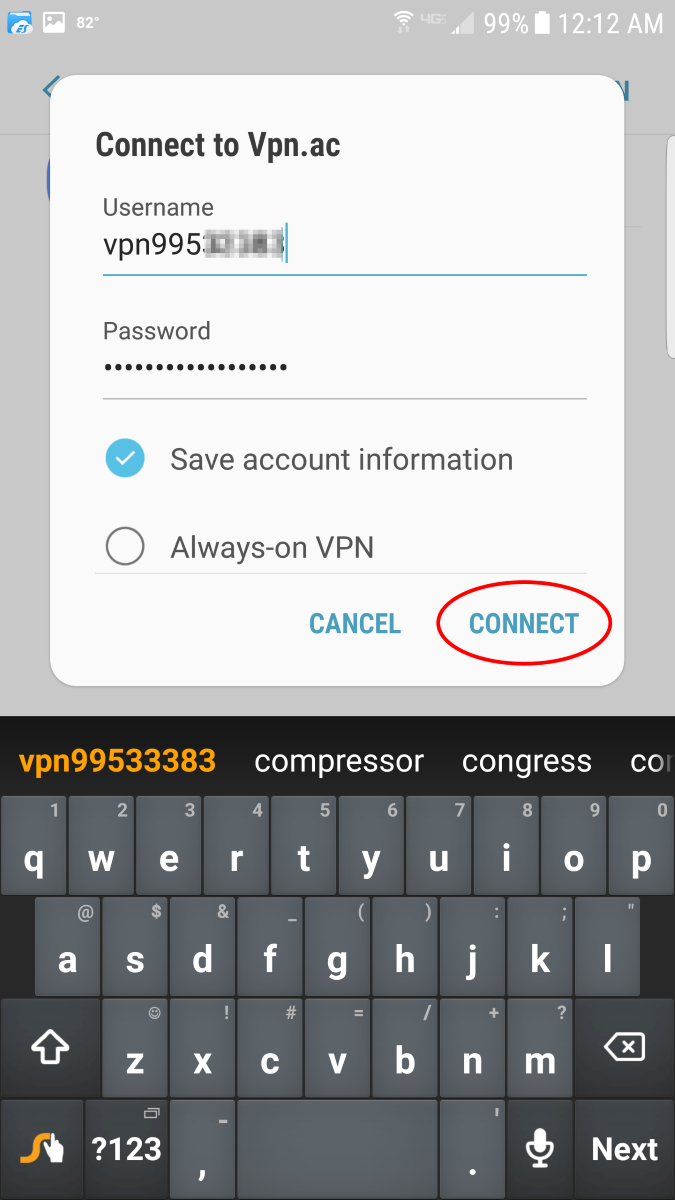
A final connection dialog panel will open, the Username and Password should already be pre-filled, just press 'Connect' .
-
Congratulations! You have now shielded your internet privacy. Anything you connect to on the internet will now be encrypted and routed through this VPN connection. This protects against eavesdroppers and network monitors from spying on your activity. In your notification bar you should see an icon with a key to indicate you are connected.


